Saturday, November 26, 2011

Fireplace Renovation

Our favorite project to date: Renovating our fireplace and adding built-ins.  Here's a side by side before and after.  This has been my favorite project partly because we did almost everything (except installing the gas fireplace insert) ourselves.  It was a ton of work, but so worth it.

 Before


                                                       After                                                            


The first picture was taken the day we were moving in and the second picture was taken today.  The following pictures show the transformation in great detail, just in case your interested.


After we removed the tile from the hearth we had to level it.


This was our first experience at tiling. The tile is actually a porcelain that looks like marble.


We weren't too careful about the grout.  We are going to be refinishing our floors at some time so we weren't too concerned about a little grout getting on it.


We found this great quarter sawn oak fireplace mantle/surround at North Shore Architectural Antiques in Two Harbors, MN.  We had originally planned on building and painting a surround, but once we found this we changed our plans a bit.


Sunday, October 23, 2011

Beadboard Ceiling

Yet another ceiling project - did we not look up when we bought this house?  We love our house, but the ceilings are bad.  This particular ceiling is in our upstairs hallway.


So it didn't always look this bad - we had done a bit of scraping to it, but it was all bubbled up and falling on the floor.  The worst part was outside our bathroom, which had no vent fan (it does now).  Anyways, the moisture from the bathroom had caused the junk on the ceiling to start to fall off.  Not sure exactly what that junk is - looks like whipped cream that's hardened (and it is hard).  As with all the projects in our house it's best to be cautious and treat it like it could have lead in it.  The plaster underneath the junk had a lot of cracks, which is probably why the whipped cream junk was put on in the first place.


We determined quickly that the hardened goo was not going to come off easily.  So we decided that we would scrape off enough to install strips of lathe to the ceiling that would be screwed into the ceiling joists above.  (We just looked in the attic to see which direction the joists ran and used a tape measure to determine where they were located.  This was pretty easy since you can see the access for the attic is located in the hallway).


Once the lathe strips were installed we could begin installing the beadboard.  We had pre-primed the pine beadboard so that it would be easier to paint once installed.


The finished ceiling - we installed a cove moulding at the ceiling to finish the ceiling.  We are so excited that we are no longer stepping on chunks of ceiling and it looks so clean and bright.  The only problem is now the walls look really terrible.  After we removed the wallpaper we discovered the walls also had chipped plaster and cracks.  Oh well, for now we'll just try to look up and admire the pretty ceiling.

Sunday, October 2, 2011

Our Kitchen Ceiling

As you can see in our pictures our kitchen ceiling needs a lot of help.  We've discovered that it is a suspended ceiling and it has been lowered by a foot!   So we want to take it down and have our original 9' ceiling back.  We discovered a few things along the way.  First, our electrical in the ceiling was no good.  Someone in the past had wired a receptacle up in the ceiling and the kitchen lights were plugged into it.  That was not going to look good and was also not the way it should have been done.  Second, we found out why they installed a suspended ceiling.  Apparently, the bathtub upstairs had once leaked and caused some water damage to the original plaster ceiling.  Some water damage, actually means that chunks of the ceiling would randomly fall down...not good at all.  So what we have learned from this is - the suspended ceiling was a cheap and easy fix for someone who didn't want to deal with the real problem.. a crumbly plaster ceiling.  I can hardly say that I blame them, it's a huge job to undertake.  So here we go - time to take down the entire ceiling.


I wish I had some pictures of us hammering away at the plaster ceiling, but I wasn't thinking about it at the time.  It was a great way to release some energy.  I do have to caution that we had to be very clean and careful because there was probably lead paint on the ceiling.  It's best to treat it that way - we wore respirators and sealed off other areas of our home.


We wired for 4 new recessed can light fixtures and installed a box for a future pendant light (for our future island - that we dream about).  We thought a lot about what to use for new ceiling.  As I mentioned earlier our bathroom is directly above the kitchen.  We plan on remodeling it someday and it would be really helpful to have access to the floor joists.  So we decided we would not use sheet rock since it might have to be opened up again someday.  We have loved the look of tin ceilings, but we don't want to invest that much at this point and since it may need to come down we won't be doing that yet.  So we decided to use plywood.  We purchased 4x8 sheets of smooth birch plywood and installed it to the ceiling.  The plywood can be taken down relatively easily to gain access to the bathroom floor joists and it could be a great substrate for that tin ceiling.  We also purchased some 1x2 strips to cover the joints.  We then filled all the holes with wood filler and painted it ceiling white.


We've also removed the baby blue and pink wallpaper - only to reveal 1950's mint green paint - that's another project.  At least our ceiling isn't falling down anymore.


Tuesday, September 27, 2011

Our 1922 home: An introduction

We'd like to introduce you to our home, a constant work in progress.  I don't know that will ever truly be able to say we are done, but we like that.  We truly enjoy working on our house and I honestly don't know that we'd be happy without a project to work on.  In fact, we sold our last house because it was too "nice" and it didn't make a lot of sense to renovate it.  Most people might think we're a little nuts, but this is what we love to do.  Warning: Before pictures are about to be posted - these pics were taken when we literally were moving in.  Try to excuse our boxes and wrapped furniture.  We knew the place had good bones, but it can be hard to look past the masses of wallpaper and dingy carpet.

Bathroom before

Bathroom before

Dining room before

Dining room before

View into foyer from living room

Foyer before

Hallway before

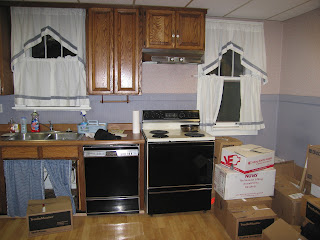
Kitchen before

Kitchen before

Kitchen before

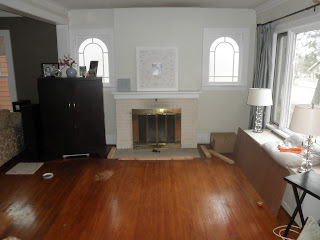
Living room before

Living room before

Master bedroom before

Master bedroom before

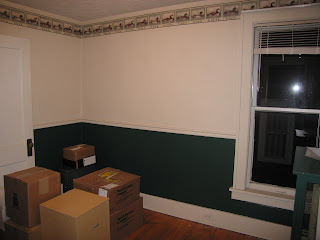
Office before

Office before

Spare room before

Spare room before

Stairway before