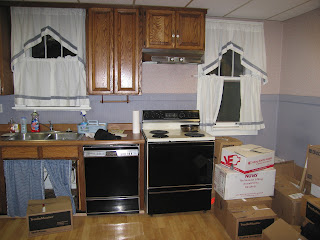
I wish I had some pictures of us hammering away at the plaster ceiling, but I wasn't thinking about it at the time. It was a great way to release some energy. I do have to caution that we had to be very clean and careful because there was probably lead paint on the ceiling. It's best to treat it that way - we wore respirators and sealed off other areas of our home.
We wired for 4 new recessed can light fixtures and installed a box for a future pendant light (for our future island - that we dream about). We thought a lot about what to use for new ceiling. As I mentioned earlier our bathroom is directly above the kitchen. We plan on remodeling it someday and it would be really helpful to have access to the floor joists. So we decided we would not use sheet rock since it might have to be opened up again someday. We have loved the look of tin ceilings, but we don't want to invest that much at this point and since it may need to come down we won't be doing that yet. So we decided to use plywood. We purchased 4x8 sheets of smooth birch plywood and installed it to the ceiling. The plywood can be taken down relatively easily to gain access to the bathroom floor joists and it could be a great substrate for that tin ceiling. We also purchased some 1x2 strips to cover the joints. We then filled all the holes with wood filler and painted it ceiling white.
We've also removed the baby blue and pink wallpaper - only to reveal 1950's mint green paint - that's another project. At least our ceiling isn't falling down anymore.


No comments:
Post a Comment